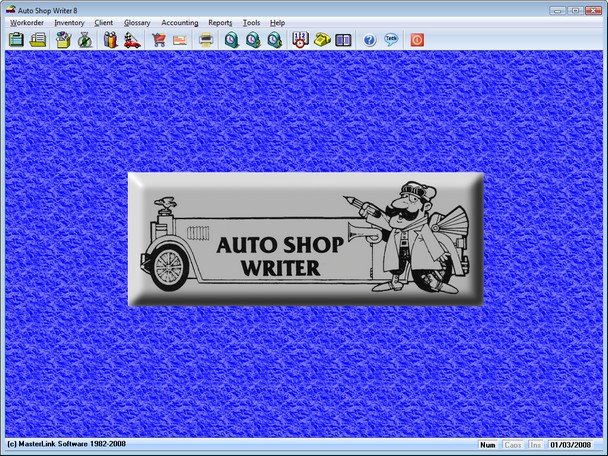
This is the primary operation window for The Auto Shop Writer Version 8. The program title is displayed on the top line, followed by the menu bar, and then an icon bar which quick starts specific repetitive operations.

Important Tips
Most operations are performed by selecting the option from the menu system, and clicking on the desired task with the left mouse button. Work is performed by using the button to ADD a new record, filling data into the displayed data fields, saving the information by pressing the SAVE button, and then exiting the procedure.
To understand what is desired in any given field, a explanation message is shown on the bottom line of the window. As the cursor arrow points at a field, the explanation is provided in the message bar. Pointing to a different field will show a new message.
When a window is displayed, and you press the F1 key, the manual will open to the reference section page appropriate for that information.
Read the prompts carefully when they pop up !
Tool Bar
To speed activity, a toolbar (icon bar ) is displayed just below the menu line. By pointing at the icon, and clicking the left mouse button, the system will automatically start a routine. Some routines which are used frequently throughout the workday have icons present which permit a faster access to that procedure. These include:
•Workorders
•Service History
•Inventory Editor
•Lost Sales
•Client Editor
•Vehicle Editor
•Vendor Check Writer
•Reports
•Time Clock
•Accoumulated Time Clock
•Downtime Clock
•Appointment Scheduler
•Phone Book
•Notebook
•Photos
•MasterLink Message Center
•Help Manual
•Chat With Tech Support
•Exit
Some of these icons for some special operations included below.
![]() Notebook
Notebook
The notebook is effective for saving a great amount of useful information about shop operations, servicing tips, and other topics.
The Notebook screen is divided into three parts. On the lower part of the screen is a browse box showing the topics. The upper left half of the screen displays a field for the topic, and then a text box. As you browse the lower box, the information is displayed in the upper boxes for the highlighted record in the browse.
The upper right section of the screen is used to display a graphic file. If you wish to attach a scanned image, or picture, into your computer, save the file to your \ASW9s folder. Then, simply enter the name of the file, with its extention ( ie. sample.jpg ) in the box titled "Image File Name".
Images are not automatically loaded as you browse the list of topics to prevent a delay while each is loaded. Instead, you can select the View Image button to actually view the file named on the screen. The view window has scroll bars to permit browsing of an object that might be too large to fit in the window, ie. a wiring diagram.
You can edit any information by making the changes and selecting the OK button. You can add a new topic by selecting the Add button, or Delete a highlighted topic using the Delete button.
Your right mouse key provides cut, copy, and paste edit features so you can modify, or move, highlighted text. Use standard windows procedures for highlighting, and moving, text in the main information window.
![]() Appointment Scheduler
Appointment Scheduler
The appointment scheduler allows you to plan your workday efectively. For a complete description of this tool, review the ![]() Appointment Scheduler chapter.
Appointment Scheduler chapter.
![]() Phone Directory / Dialer
Phone Directory / Dialer
The Phone Directory and Dialer allows you to place phone calls using a modem connected to your computer. Review the ![]() Phone Directory chapter for complete instructions.
Phone Directory chapter for complete instructions.
![]() Photos
Photos
The Photo catalog allows you to attach digital pictures to workorders, clients, vehicles, employees, parts, and vendors.
![]() MasterLink Message Center
MasterLink Message Center
You can post messages, and read them, throughout your business via the Auto Shop Writer system. Calls received can be posted as messages eliminating all those paper notes ... or post a message about a meeting, or special event.