Before entering charges, keep these key points in mind:
•Inventory Stock Input transactions are posted to Accounts Payable automatically
•Vendor invoices not created through inventory must be entered manually
•Bills should normally be posted the day they are received
•Payments may be made:
oFor a single vendor account
oFor multiple accounts during batch processing
Timely posting keeps:
•Vendor balances accurate
•Aging reports current
•Payment scheduling reliable
Accessing the Posting Screen
Manual charges are entered through the Post screen.
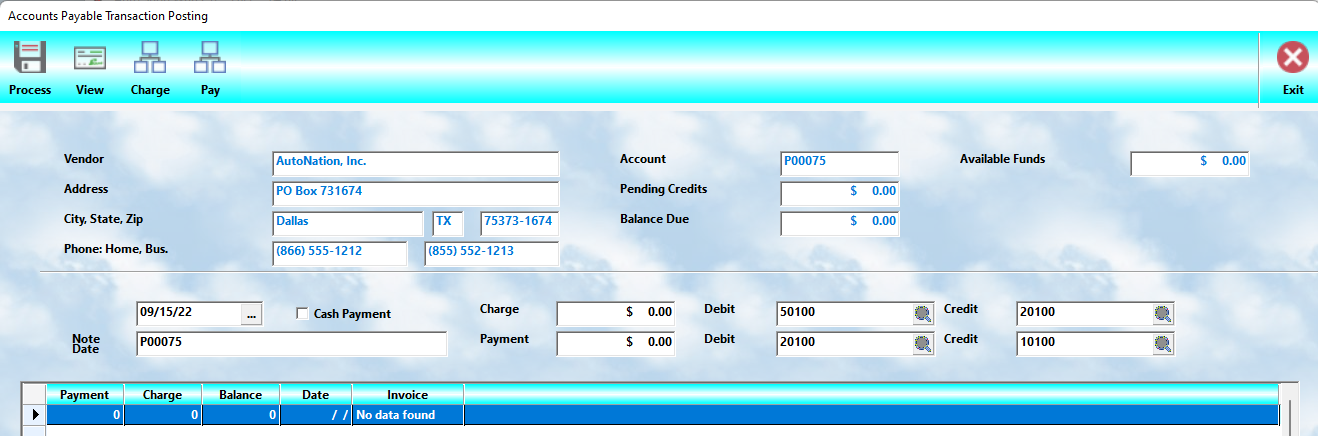
(Some MLS 2026 functions, such as Inventory Control, create A/P transactions automatically.)
When opening the Post option:
1.A list of vendors is displayed
2.Select the desired vendor account
3.Select OK
(Insert Posting Screen image here.)
Entering a Vendor Invoice
To enter a bill:
1.Enter the amount in the Charge field
2.Verify the:
oDebit G/L account
oCredit G/L account
3.Enter a Note
oUsually the vendor invoice number
4.Save the transaction
Once saved, the charge is immediately applied to the vendor account.
Entering Multiple Invoices
To enter additional invoices quickly:
•Select the New button after saving each transaction
•Choose the next vendor account
This allows rapid entry of multiple vendor bills during daily processing.
Understanding Debit and Credit Posting
When a vendor invoice is entered:
MLS 2026 records:
•Debit → Expense account
•Credit → Accounts Payable liability account
This:
•Records the business expense
•Creates the payable owed to the vendor
Spread G/L Distribution
In most cases, a charge is applied to a single expense account.
However, some invoices may need to be divided across multiple General Ledger accounts.
Examples:
•Utility bills split between departments
•Mixed purchases on one vendor invoice
•Shared operating expenses
The Spread G/L option allows this distribution.
(Insert Spread G/L image here.)
Using Spread G/L
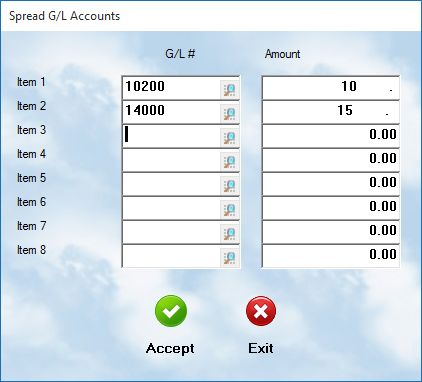
To distribute an invoice across multiple accounts:
1.Enter the total invoice amount in the Charge field
2.Open the Spread G/L screen
3.Enter:
oG/L account number
oDebit amount
for each distribution line
Important Rule
⚠️ The total of all distributed Debit entries must exactly equal the amount entered in the Charge field.
The system will not process the transaction unless the totals balance correctly.
Best Practices
•Post invoices promptly when received
•Always include the vendor invoice number in Notes
•Verify G/L accounts before saving
•Use Spread G/L only when necessary
•Review totals carefully before processing
Common Examples
Single Expense Posting
Vendor invoice:
•Shop supplies → One expense account
Spread G/L Posting
Vendor invoice contains:
•Shop supplies
•Equipment expense
•Office expense
Split the invoice across multiple Debit accounts.