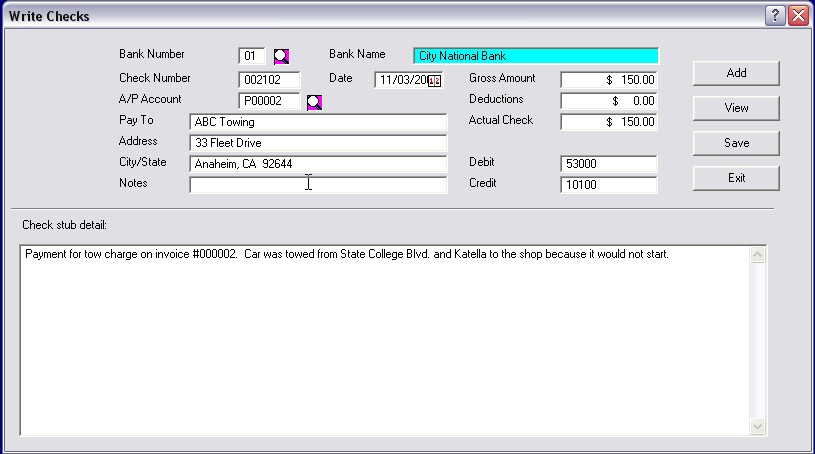
Writing checks in the bank account is only for payments that would not be reflected in the Accounts Payable (non- vendor payments). This might include special contributions, non-billed loan payments, etc.
Write Checks

Select the Bank - Write option and the system will display a check creation screen. First, enter the bank system ID number, and the name of the bank / account will be displayed. Then fill in the remainder of the information on the screen, including the amount(s), check number ( if it is a handwritten check you are posting ), and the G/L numbers.
If the payee is listed in the Vendor file, putting the account number into the specified field will bring up the name, and address information. Otherwise, these will need to be typed in manually.
The ![]() button can be used to lookup bank and vendor information.
button can be used to lookup bank and vendor information.
You can also type in detailed information to be printed on the check stub if you wish.
When you press the ![]() button, the information will be stored and applied. You may preview the check by selecting the
button, the information will be stored and applied. You may preview the check by selecting the ![]() button. You may write another check by selecting the
button. You may write another check by selecting the ![]() button.
button.
Deposits/ Charges
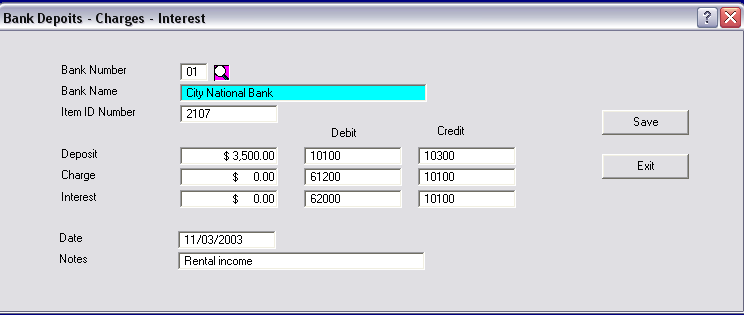
To make a deposit, select the Bank menu, and then the Deposits/Charges option.

When making a deposit, or charge, to the bank, the system will first need to know the account to which the money is to be deposited. You may use the down area to the right of the bank code field to look up the proper account if desired.
Once an account is selected, and displayed, you may enter the total amount of the deposit, or charge. Enter it from the deposit slip you have completed. Then enter the deposit slip number, and the source of income if desired. The system needs the date. The current date is shown, and may be accepted, or a new date may be entered. The system will show the default General Ledger account numbers, and you have the option of accepting them, or changing them to other values.
The G/L system tests to see if the number you entered is a valid account and if it is appropriate for that use. If there is no account number that matches, or if you select a Debit account for a Credit entry ( or the opposite ), the system will pop up the chart of accounts. You may select any account ( it will permit posting credits to a debit account and the reverse ) at this point.
Once you press the ![]() button, the system will apply the depost or charge to the bank account, and adjust the totals accordingly.
button, the system will apply the depost or charge to the bank account, and adjust the totals accordingly.